Workflows & Rules Engine
Design node-based notification automation flows on the visual canvas or trigger them programmatically. Every event POST to /api/v1/events evaluates active Rules first, then triggers active Workflows whose TRIGGER node eventName matches.
1. How Events, Rules & Workflows Connect
When your backend POSTs to /api/v1/events, HubNest does two things in sequence:
- 1. Rule Engine Evaluation: All active Rules are evaluated against the event payload. If a Rule condition matches, the Rule action (channel + template) is dispatched immediately.
- 2. Workflow Engine Evaluation: All active Workflows are checked. Those whose TRIGGER node eventName matches the incoming eventName are executed as a DAG run.
- Both Rule and Workflow can fire on the same event simultaneously.
- The event response includes ruleMatched, ruleNotificationStatus, and workflowsTriggeredCount fields.
2. Workflow Canvas Node Types
The visual canvas supports 6 node types (verified against WorkflowEngineService.java):
- TRIGGER: Start node — specify eventName (e.g. order.placed). Workflow runs when this event matches.
- CONDITION: Branch node — evaluates a payload field (field, operator, value). Outgoing edges must be labeled "true" and "false".
- SEND_ACTION: Dispatch node — specify channel (EMAIL/SMS/WHATSAPP/PUSH) and templateId (UUID of your template).
- WAIT / DELAY: Pause node — specify duration in seconds (e.g. 3600 = wait 1 hour before next node).
- UPDATE_FIELD: Mutation node — set field = value in the execution payload for downstream nodes.
- END: Termination node — marks the workflow run as completed.
3. Build a Workflow Visually (5 Step Visual Builder Console)
Follow the 5 step visual builder guide below to create, configure, and publish active workflow DAG pipelines:
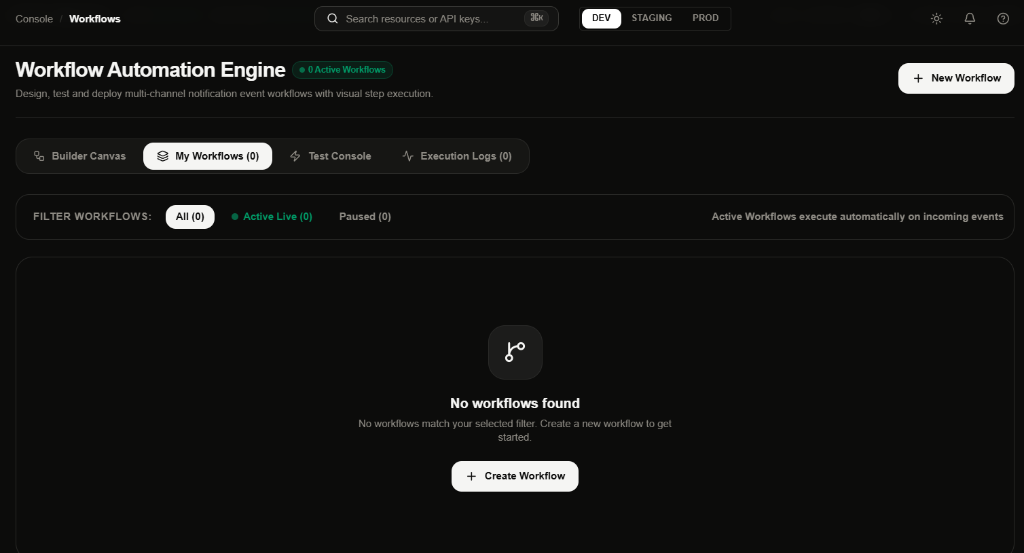
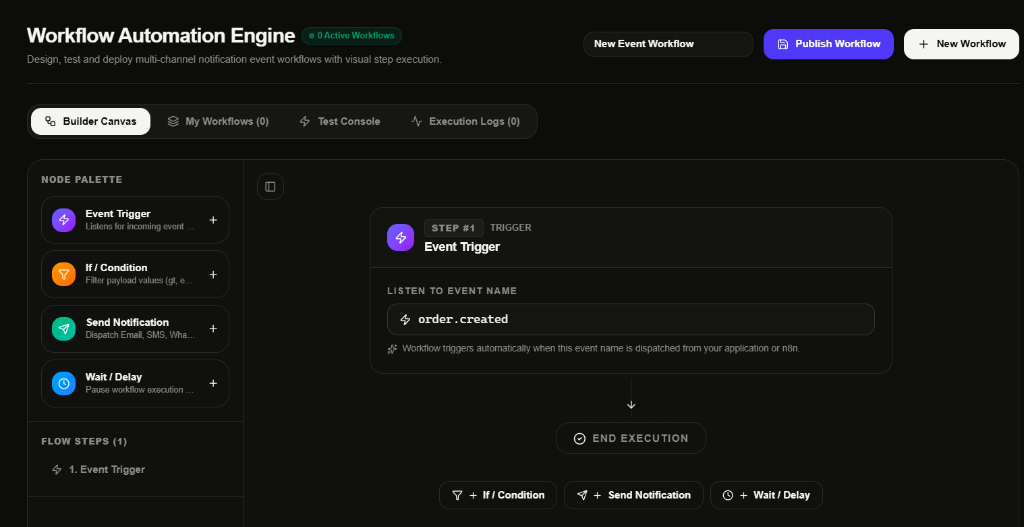
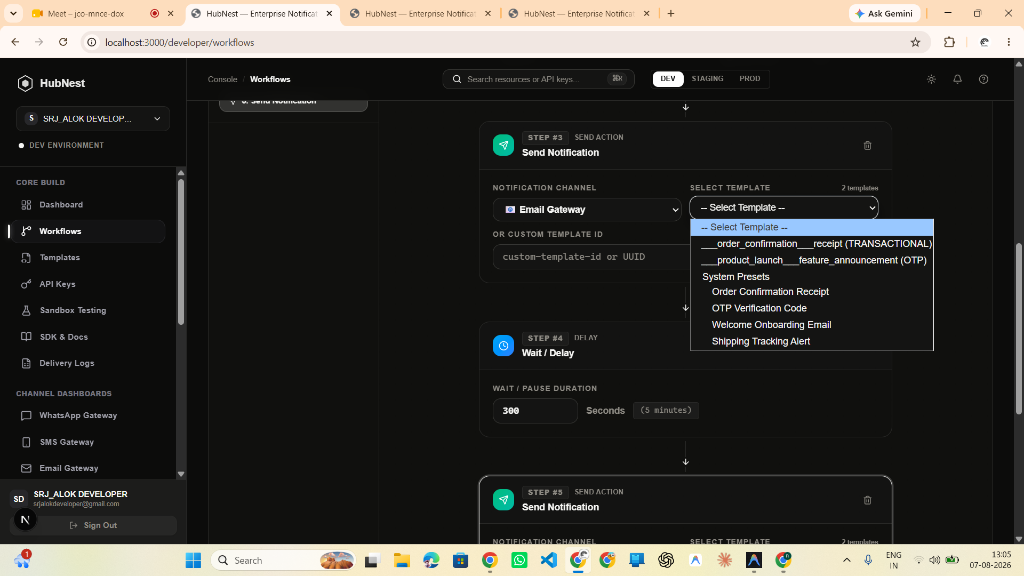
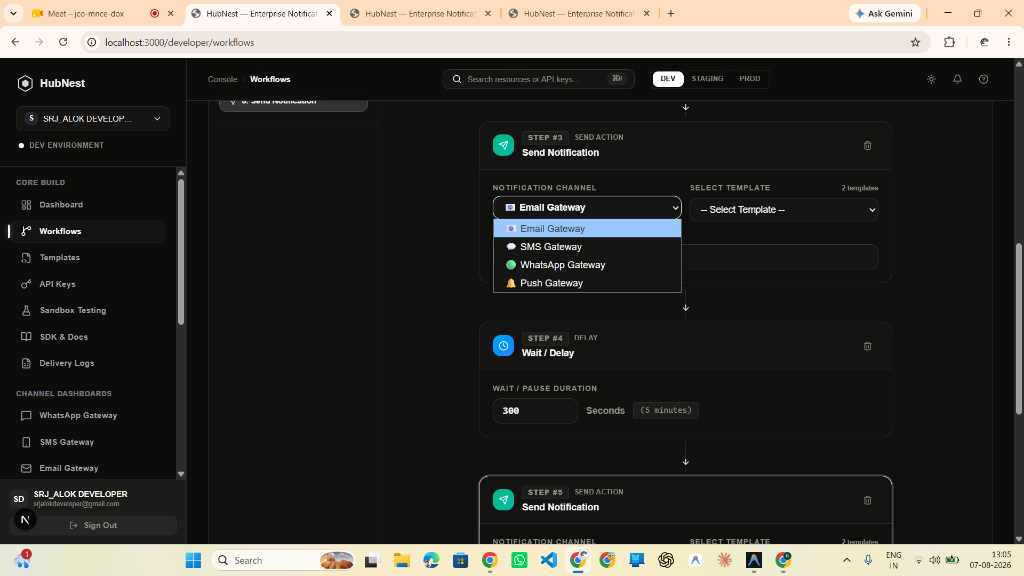
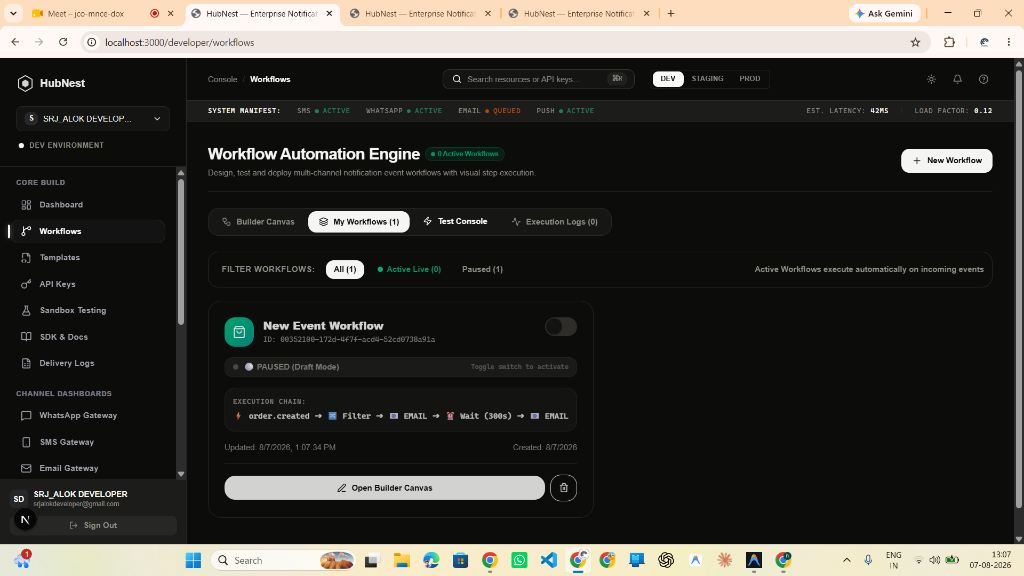
- Step 1 (Console Setup): Select environment (DEV/STAGING/PROD) and click + New Workflow.
- Step 2 (Event Binding): Drag Event Trigger node and set LISTEN TO EVENT NAME to "order.created".
- Step 3 (Template Mapping): Select message template preset (e.g. Order Confirmation Receipt, OTP Code, Welcome Email).
- Step 4 (Channel Gateway Routing): Pick destination channel (Email Gateway, SMS Gateway, WhatsApp Gateway, Push Gateway).
- Step 5 (Publish Pipeline): Click Publish Workflow. Toggle Active Live switch ON. Execution chain: order.created ➔ Filter ➔ EMAIL ➔ Wait (300s) ➔ EMAIL.
4. Set Up the Rules Engine
Rules are simpler than Workflows — for basic "if condition → send notification" logic. Go to Developer → Integrations → Rules → New Rule:
- Name: Give the rule a descriptive name (e.g. "High Value Order Email").
- Condition JSON: Define the payload field condition (e.g. { "field": "amount", "operator": "gt", "value": 5000 }).
- Action JSON: Define what to dispatch (e.g. { "channel": "EMAIL", "templateId": "<template-uuid>" }).
- Toggle "Is Active" to ON.
- Fire events from your backend — matching events auto-dispatch the rule action.
5. Fire Events from Your App
From your backend application, POST events to HubNest to trigger both Rules and Workflows. Include the recipient in the to field:
6. Test & Monitor Execution
Monitor your workflow runs from the Developer Console:
- Test Console: In Developer → Workflows → click your workflow → Test. Paste a sample JSON event payload and click Run Test. See step-by-step execution log including which nodes fired and what was dispatched.
- Execution Runs Table: View all past workflow runs with status (running/completed/failed), start time, and path taken through the node graph.
- Delivery Logs: Go to Developer → Logs to see per-notification delivery status for every message dispatched by your workflows.
- Webhook Callbacks: Configure a webhook at Developer → Webhooks to receive real-time DELIVERED/FAILED status callbacks.
Next steps
Configure AWS SES IAM keys, verified domains, and sending rate limits.
Connect SendGrid API Keys and verified sender identities.
Connect Twilio Account SID, Auth Token, and phone numbers.
Connect Meta WhatsApp Cloud API access tokens and phone number IDs.