WhatsApp Business Cloud API Integration
Connect Meta WhatsApp Business Cloud API for transactional HSM template messages and session messages. HubNest supports Meta Embedded Signup (recommended) and manual token setup.
1. Select WhatsApp Provider in Integrations Console
Log in to HubNest Console → Integrations at https://app.hubnest.io/developer/integrations. Filter by WhatsApp channel. Find Meta WhatsApp Cloud API or Gupshup WhatsApp, then click CONNECT.
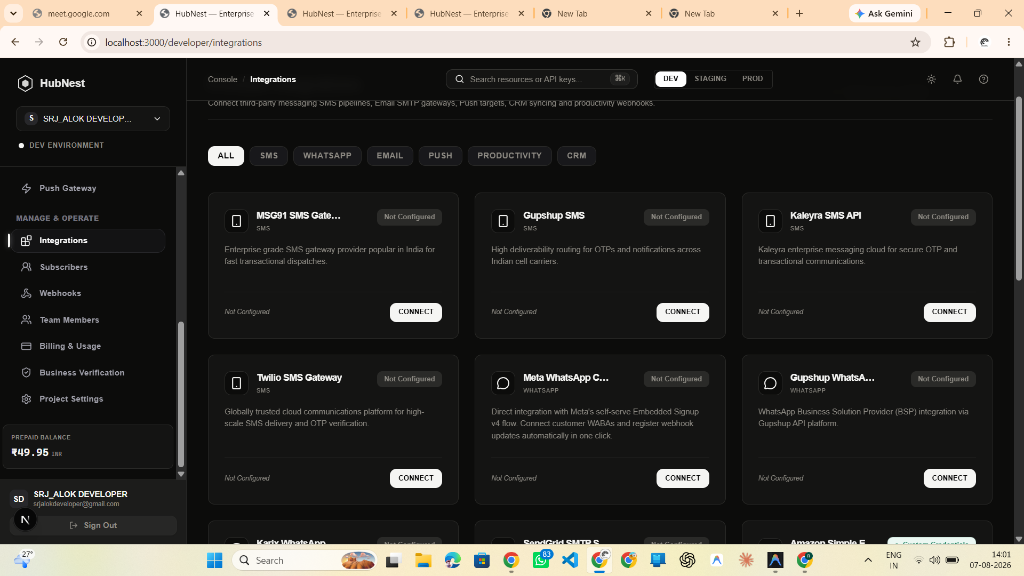
2. Select Routing Mode (Master Account vs Custom API Key)
Choose your billing & routing preference in the popup modal:
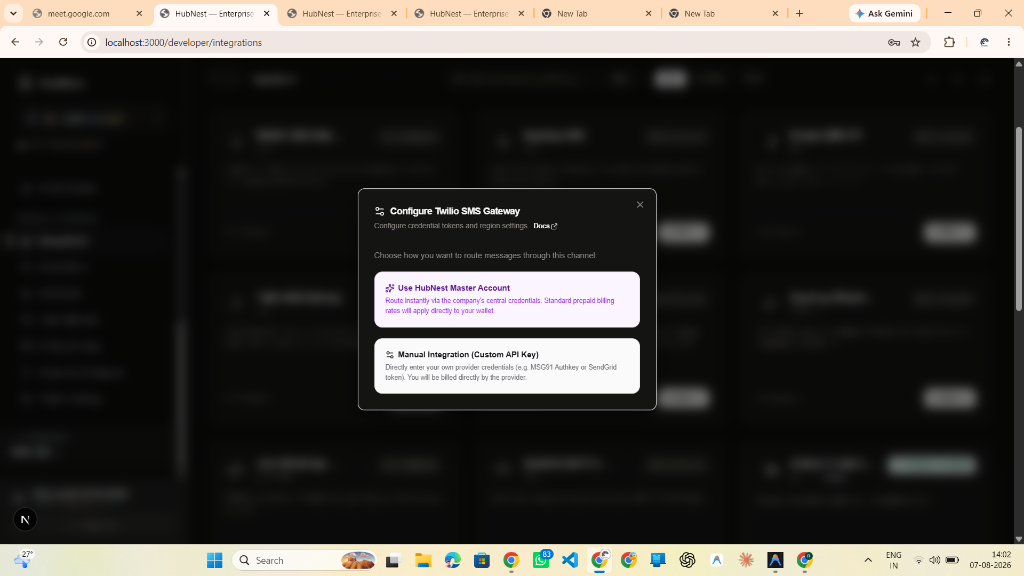
- Use HubNest Master Account: Route instantly via HubNest central Meta WABA contracts with prepaid wallet billing.
- Manual Integration (Custom API Key): Directly connect your own Meta System User Access Token and Phone Number ID.
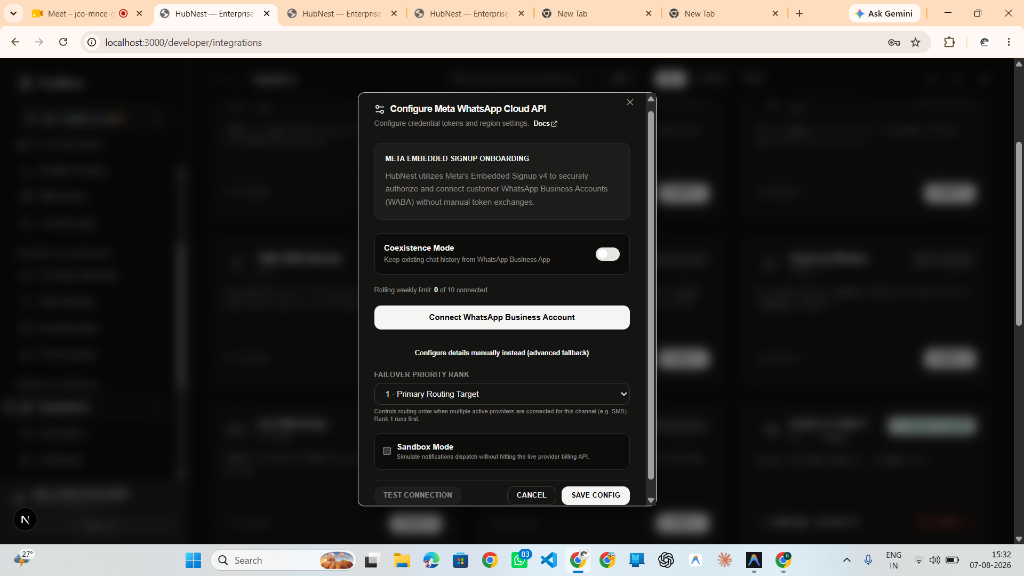
3. Meta Embedded Signup Onboarding (Recommended)
Click "Connect WhatsApp Business Account" to launch Meta Embedded Signup v4. Authorize your WABA without manual token exchanges.
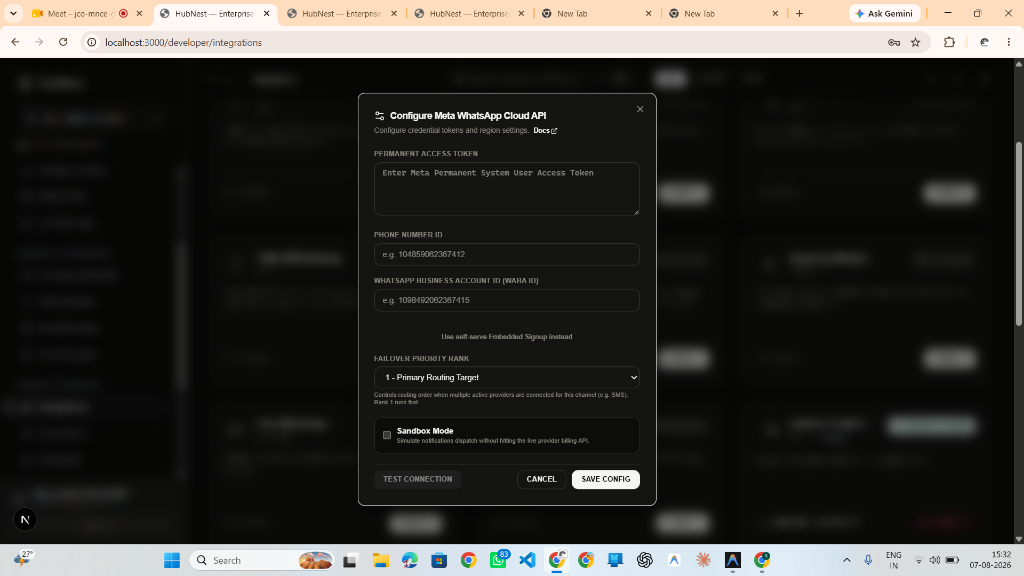
4. Manual Token Setup (Alternative Fallback)
If configuring manually: Fill in your Meta Permanent System User Access Token, Phone Number ID (numeric), and WhatsApp Business Account ID (WABA ID). Click Test Connection then Save Config.
5. Monitor Live WhatsApp Telemetry, Limits & Click Rates
Open Channels → WhatsApp Gateway to view live dispatch metrics, Delivery Success Rate (100.0%), Interactive Click Rate (28.4%), telemetry line charts, and interactive delivery donut share.
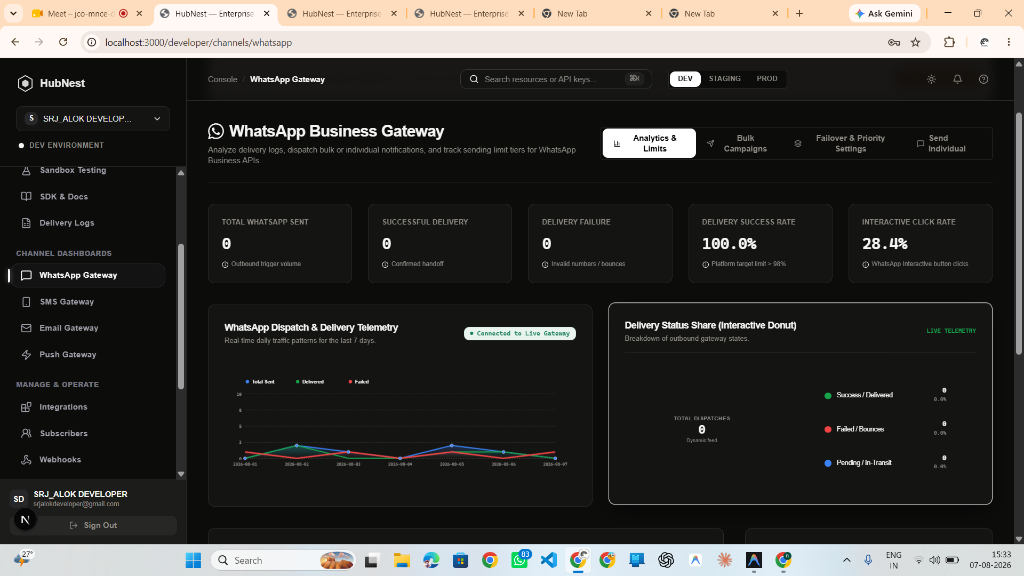
- Tracks Total WhatsApp Sent, Successful Delivery, and Delivery Failures.
- Interactive Click Rate target >= 25%.
- Connected to Live Gateway status badge.
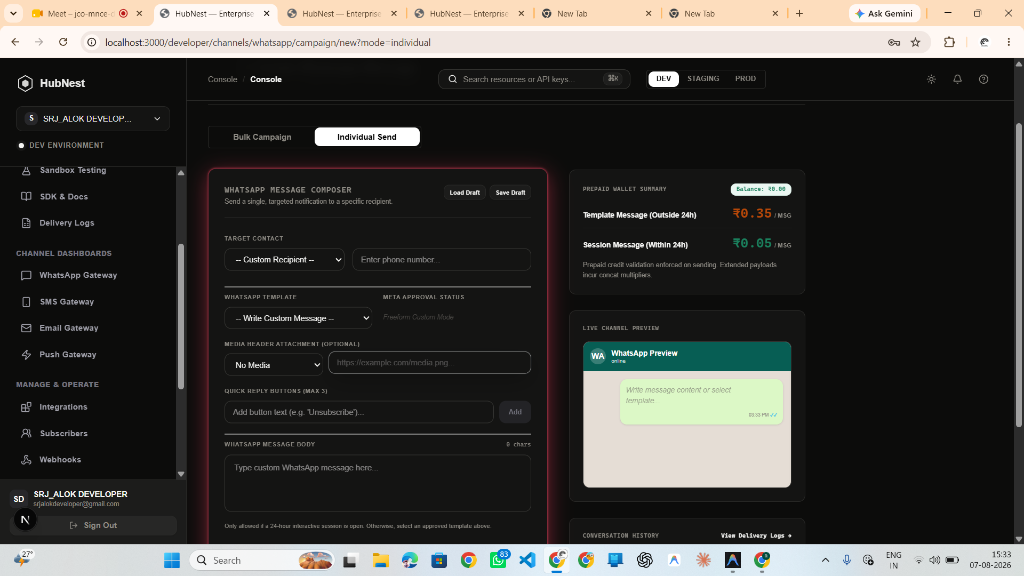
6. WhatsApp Message Composer & Live Chat Bubble Preview
Click "Individual Send" tab. Fill Target Contact phone number, select WhatsApp Template or Freeform Custom Mode, attach Media Header (image/video/document URL), add up to 3 Quick Reply Buttons (e.g. Unsubscribe), and type your message body. View the live green chat bubble preview on the right sidebar.
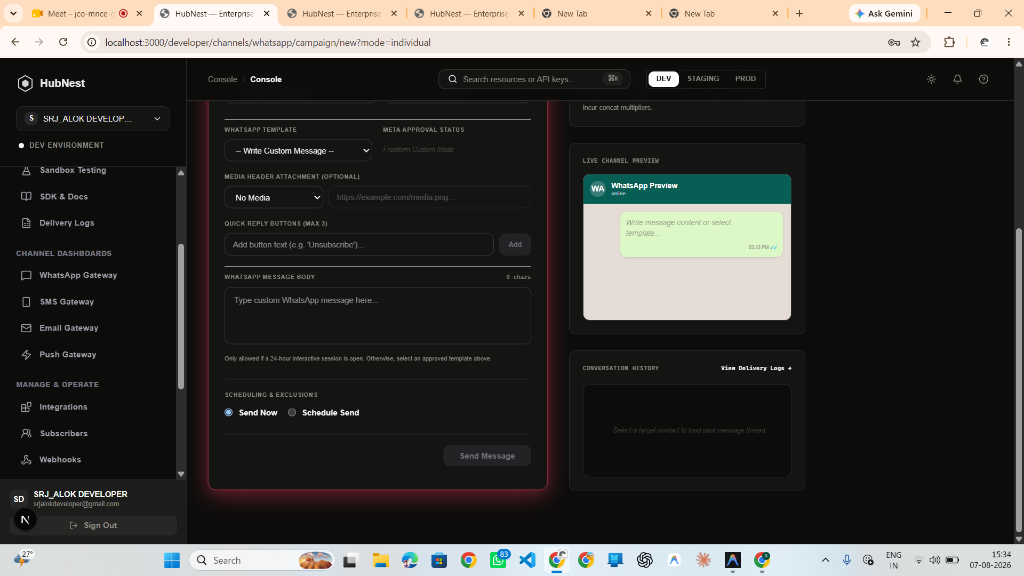
7. Schedule Execution Timing & Dispatch Message
Select execution timing mode ("Send Now" vs "Schedule Send") and click "Send Message" to dispatch your WhatsApp notification immediately.
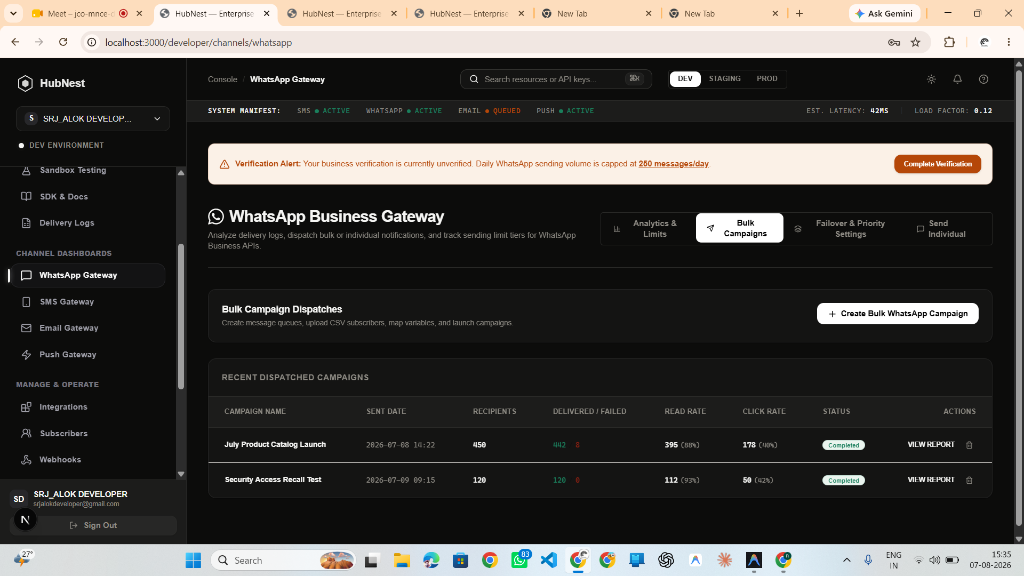
8. Bulk WhatsApp Campaigns Dashboard & Dispatched History
Go to Channels → WhatsApp → Bulk Campaigns tab. Review past dispatched campaigns (e.g. July Product Catalog Launch, Security Access Recall Test) with delivered/failed counts (442 Delivered / 8 Failed), Read Rate (88%), Click Rate (40%), and VIEW REPORT actions. Click "+ Create Bulk WhatsApp Campaign" to launch the campaign wizard.
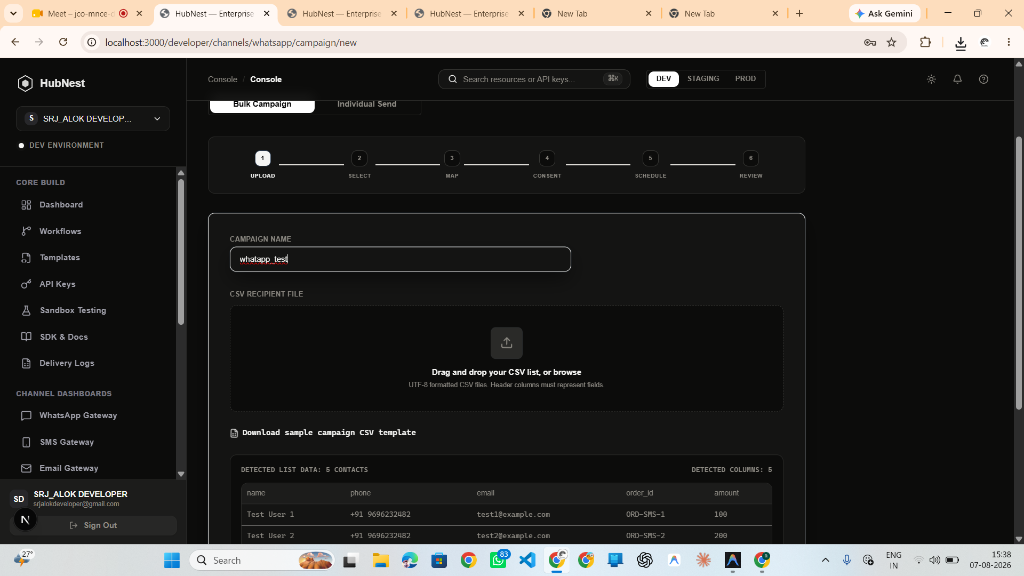
9. Campaign Wizard Step 1: Upload Recipient CSV & Campaign Name
In Step 1 of the Campaign Wizard: Enter your campaign name (e.g. whatapp_test) and drag-and-drop your recipient CSV file. The preview table auto-detects contact list data (e.g. 5 Contacts: Test User 1, 2, 3, 4).
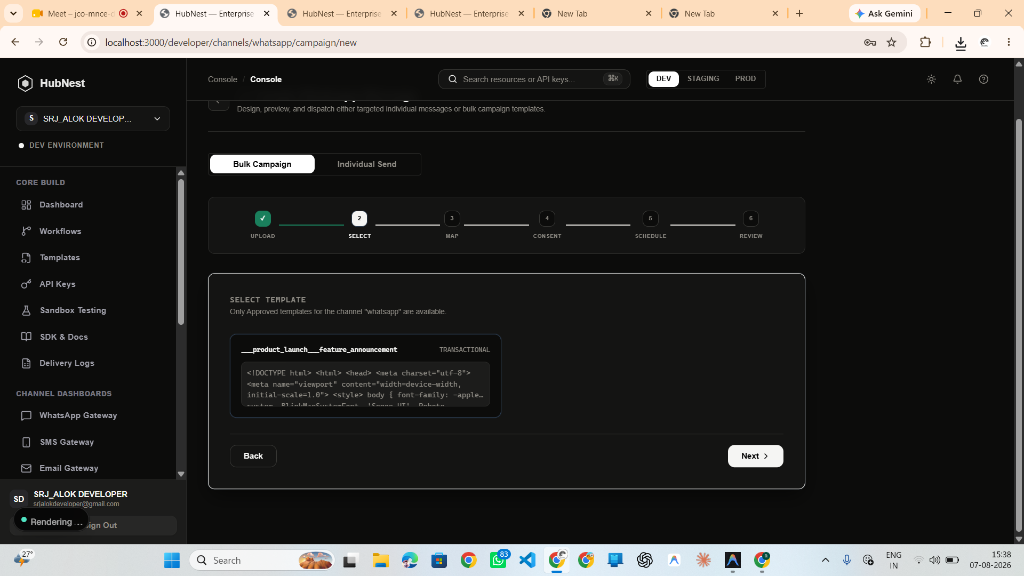
10. Campaign Wizard Step 2: Select Message Template
In Step 2 of the Campaign Wizard: Select your registered WhatsApp message template card (e.g. __product_launch__feature_announcement - TRANSACTIONAL). Click Next > to proceed.
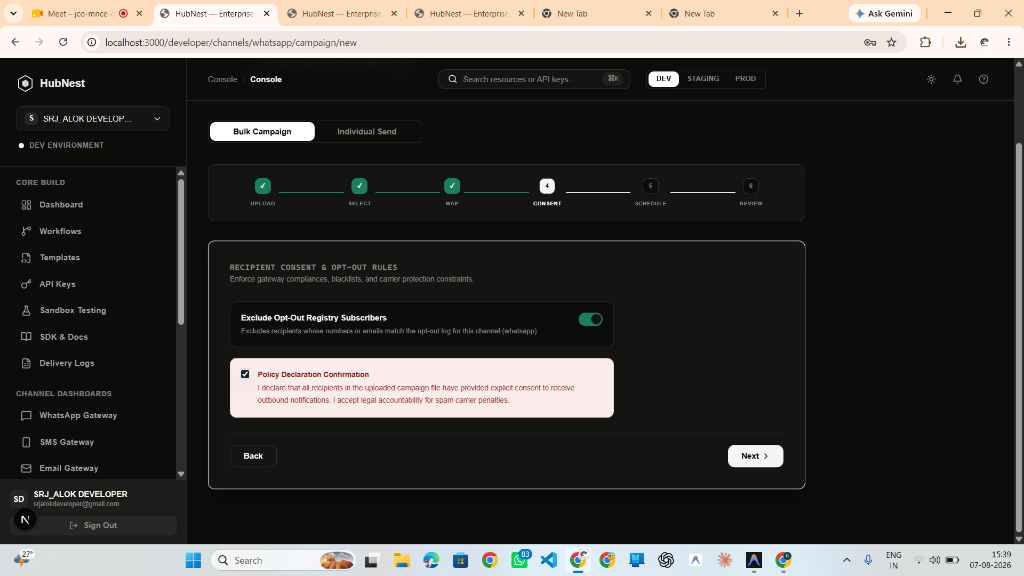
11. Campaign Wizard Step 3: Recipient Consent & Opt-Out Rules
In Step 3 of the Campaign Wizard: Toggle "Exclude Opt-Out Registry Subscribers" to automatically exclude blacklisted WhatsApp numbers. Check "Policy Declaration Confirmation" to confirm compliance with Meta WhatsApp carrier regulations.
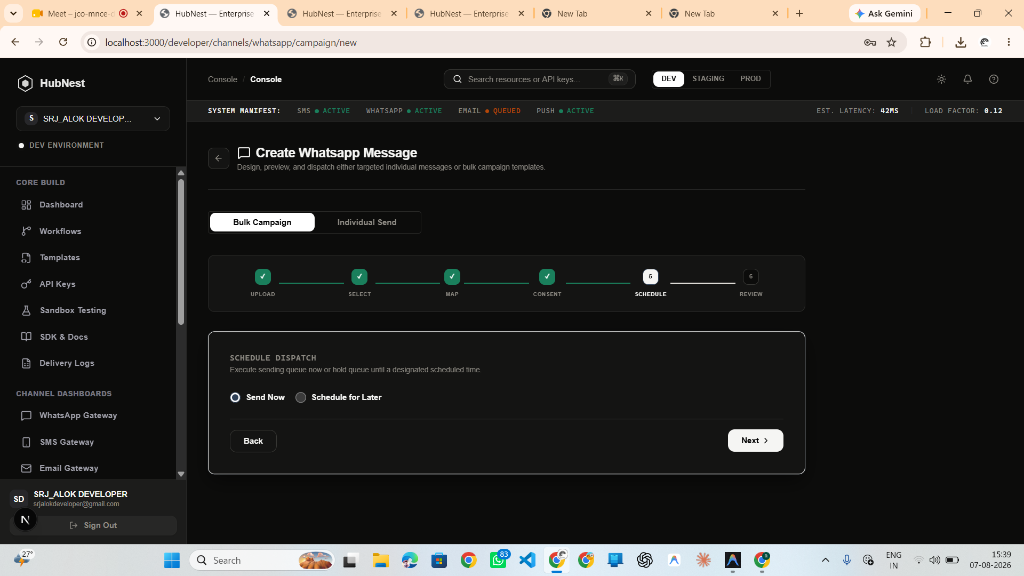
12. Campaign Wizard Step 4: Schedule Dispatch
In Step 4 of the Campaign Wizard: Choose execution timing mode — "Send Now" for instant broadcast queueing or "Schedule for Later" for automated future dispatch.
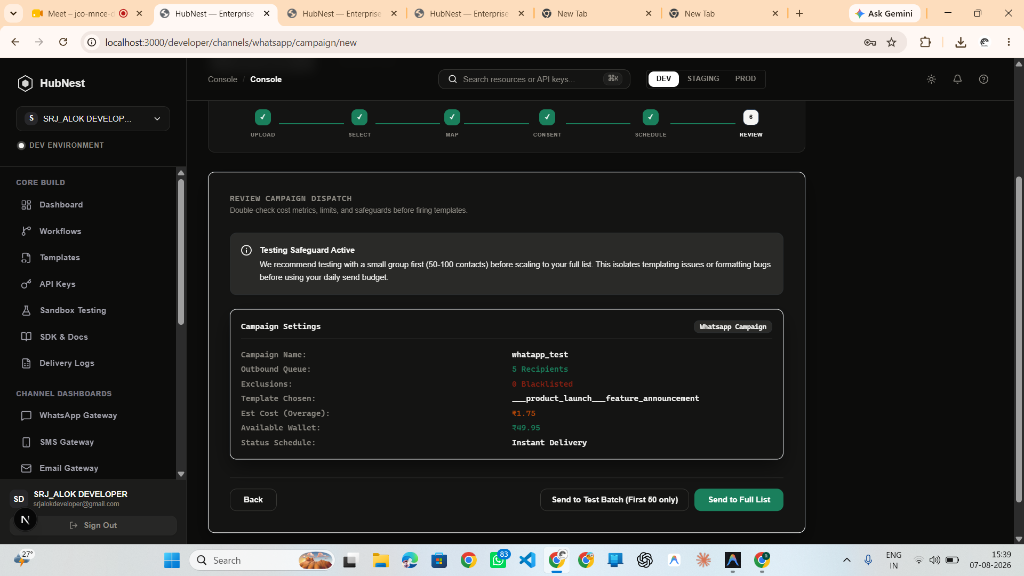
13. Campaign Wizard Step 5: Review Dispatch & Send to Full List
In Step 5 of the Campaign Wizard: Review campaign settings (Outbound Queue: 5 Recipients, Template Chosen: __product_launch__feature_announcement, Est. Cost: ₹1.75, Available Wallet: ₹49.95). Click "Send to Full List" or "Send to Test Batch (First 50 only)" to launch live broadcast.
Next steps
Configure AWS SES IAM keys, verified domains, and sending rate limits.
Connect SendGrid API Keys and verified sender identities.
Connect Twilio Account SID, Auth Token, and phone numbers.
Connect Meta WhatsApp Cloud API access tokens and phone number IDs.